Is your Tineco iFloor 2 no longer spraying water?
Don’t worry, you are not alone.
In fact, this is a common problem that can be easily resolved with a little troubleshooting 🙂
I wrote this easy-to-follow guide to help you fix the issue without the need to contact Tineco. So, hopefully, following the steps below will be enough to get your Tineco iFloor 2 working properly again!
In this guide, you will learn:
- Possible reasons why your Tineco iFloor 2 no longer sprays water
- What to do to fix the issue
- When it is time to contact Tineco
Why Your Tineco iFloor 2 Is Not Spraying Water
Your Tineco iFloor 2 may stop spraying water if the Clean Water Tank is not filled or installed correctly, the spray pump is blocked, the spray hole has clogs, the machine needs a self-cleaning cycle, or you are using a cleaning solution that is not Tineco-approved.
How To Fix The Issue
Alright, now that we’ve gone through the reasons why your Tineco iFloor 2 is not spraying water, it’s time to roll up our sleeves and get to work.
But don’t worry, fixing this problem is like changing a tire, it’s a breeze once you know how to do it 🙂
So, let’s dive into the troubleshooting steps and see if we can get that water flowing again.
Execute each step one by one, making sure you test your Tineco iFloor 2 each time to see if that particular step fixed the spraying issue.
And if none of the steps help, well, we’ll just have to call Tineco and blame it on the machine, that’s what warranties are for 😉
1. Check The Clean Water Tank
So, the first thing we’re going to check is the clean water tank.
It’s a simple step, but sometimes the simplest things are the ones that slip our mind.
Here’s what you need to do:
- Go ahead and remove the clean water tank
- Give it a quick glance and make sure it’s more than one-third full, or ideally has water all the way up to the Max line
- If you need to refill the water tank, go for it! Just make sure you use clean water and not your morning coffee (unless you want your floors to smell like it)
- Now that the tank is full, reinstall it making sure it’s securely in place
2. Re-prime The Spray Pump
The next thing we’re going to check is the functionality of the spray pump.
Sometimes, the pump may have lost its prime, especially if you haven’t used your Tineco iFloor 2 for a while.
Here’s what you need to do:
- Switch off the machine
- Hold the spot button for 30 seconds. This will help re-prime the pump.
- Switch your Tineco iFloor 2 back ON and press the spot button to test whether the issue has been fixed
3. Remove Clogs From The Sprayer
The next thing we’re going to check is whether the sprayer hole is blocked.
Sometimes, the smallest clogs can cause the biggest headaches!
Here’s what you need to do:
- Remove the brush roller from the vacuum head
- Inspect the chamber for any clog
- Use a damp cloth to clean the chamber, getting rid of any debris that have built up
- If the water is still not spraying properly, you can try unclog the spray hole with a fine needle
4. Run a Self-Cleaning Cycle
Next, let’s run a self-cleaning cycle. Sometimes, your Tineco iFloor 2 just needs a little spa day to get back in action!
Here’s what you need to do:
- Start by removing the clean water tank and filling it up to the Max line
- Reinstall the tank, making sure it’s securely in place
- Place your Tineco on its storage pad and plug it in
- Long press the ON button on the machine for 3 seconds until the self-cleaning cycle starts running
- Sit back, relax and let the cycle complete.
5. Make Sure You are Using Tineco’s Cleaning Liquid
Now, let’s talk about cleaning solutions.
You may not be aware that using anything other than Tineco’s approved cleaning solution can void your warranty.
Make sure you’re not using any fancy third-party products like foamy detergents or eucalyptus oil. Having a clean floor that smells like a spa would be nice, but extending the lifespan of your machine is even better!
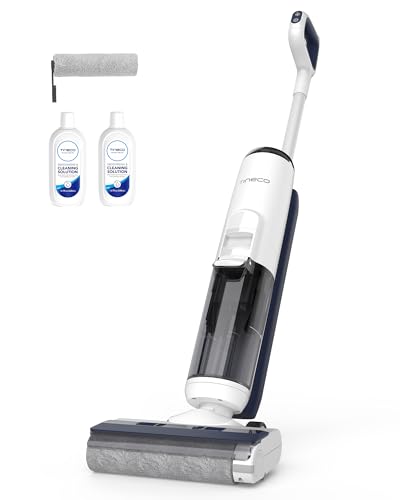
You can find Tineco’s own cleaning solution on Amazon:
Once you receive the cleaning solution, check the instructions on the bottle to see how much liquid you need to use to ensure best performance for your Tineco iFloor 2.
What If My Tineco iFloor 2 Is Still Not Spraying Water After Troubleshooting?
If you’re still experiencing issues with the water spray function on your Tineco iFloor 2, despite following the above troubleshooting steps, it may be time to reach out to the manufacturer for support.
Fortunately, Tineco provides a 2-year limited warranty for their products.
The warranty will cover both repair and replacement options, assuming that:
- The machine was not used for commercial purposes
- The machine was purchased from an authorized retailer
Additionally, Tineco also offers a 1-year warranty for any motorized accessories and batteries purchased separately.
Conclusion
As you can see, the Tineco iFloor 2 not spraying water issue can be resolved by following a few troubleshooting steps.
To recap, here is what you can try:
- Ensure the CWT is filled in and installed correctly
- Unfreeze the spray pump by repriming it
- Clean the spray hole
- Run a self-cleaning cycle
- Use a Tineco approved cleaning solution
Remember that if the problem persists, you can contact Tineco for assistance and take advantage of their 2-YEAR LIMITED WARRANTY that covers repair or replacement of the vacuum.
Happy cleaning!


