Shark vacuums are known for their powerful suction and advanced features, but even the best machines can experience issues from time to time. One common problem that many Shark vacuum owners face is when the vacuum lights are on, but the machine won’t start. This can be a frustrating issue to deal with, but thankfully, there are a few potential solutions that can help you get your Shark vacuum up and running again.
If you’re experiencing this problem with your Shark vacuum, the first thing to check is the power source. Make sure that the vacuum is properly plugged in and that the outlet is functioning correctly. If the outlet is working fine, you may want to check the circuit breaker or fuse box to see if the vacuum’s circuit has been tripped. If the circuit breaker has been tripped, you can reset it to see if that solves the problem.
Another potential issue that could be causing your Shark vacuum to have its lights on but not start is a clogged filter or hose. If the vacuum’s filter or hose is dirty or clogged, it can prevent the machine from starting properly. In this case, you’ll need to clean or replace the filter and/or hose to get your Shark vacuum working again.
Understanding the Problem
If you’re having trouble with your Shark vacuum not starting even though the lights are on, there are a few things you can do to diagnose and fix the issue.
First, check to make sure the vacuum is properly plugged in and the outlet is functioning. If the outlet is working, but the vacuum still won’t start, there may be an issue with the power cord or motor.
It’s important to note that if your Shark vacuum is still under warranty, it’s best to contact Shark customer service before attempting any repairs yourself.
If the vacuum is out of warranty, you can try taking it apart and testing the power cord using an electric multimeter. Check the impedance of each wire in the power cord to see if there are any issues.
Another potential issue could be a blown internal fuse. Check to see if the vacuum has an internal fuse and test it to see if it needs to be replaced.
If the power cord and internal fuse are both functioning properly, the issue may be with the motor. Remove the motor from the vacuum and test it with a multimeter to see if it’s damaged. If it is, you will need to replace it.
Overall, troubleshooting a Shark vacuum that won’t start can be a bit tricky, but by following these steps and checking for common issues, you can get your vacuum up and running again in no time.
Common Causes of Shark Vacuum Not Starting
When your Shark vacuum cleaner lights up but won’t start, it can be frustrating. There are several reasons why your vacuum may not be starting. In this section, we will explore the most common causes of Shark vacuum not starting and how to troubleshoot them.
Power Issues
One of the most common causes of Shark vacuum not starting is power issues. If your vacuum is not plugged in correctly, it won’t start. Ensure that the power cord is securely plugged into the power outlet. If the power outlet is not functioning, try plugging the vacuum into a different outlet. If the outlet is the issue, reset the circuit breaker or replace the fuse.
Blockages
Blockages in the vacuum’s hose or brush roll can prevent the vacuum from starting. Check for any blockages and remove them. If there are no visible blockages, try removing the hose from the vacuum and checking for blockages. If there are blockages, remove them and reattach the hose.
Filter Issues
If the vacuum’s filter is clogged or dirty, it can prevent the vacuum from starting. Check the filter and clean or replace it if necessary. If the filter is clean, but the vacuum still won’t start, remove the filter and try starting the vacuum without it. If the vacuum starts, the filter may need to be replaced.
Motor Issues
If the vacuum’s motor is damaged, the vacuum will not start. To check the motor, remove it from the vacuum and test it with a multimeter. If the motor is damaged, you will need to replace it.
In conclusion, when your Shark vacuum lights up but won’t start, it can be frustrating. However, by following the troubleshooting steps outlined in this section, you can identify and fix the problem quickly.
Checking for Blockages
If your Shark vacuum lights are on but it won’t start, it could be due to a blockage. Here are some steps you can take to check for blockages:
Hose
The hose is the most common place for blockages to occur. To check for blockages in the hose, detach it from the vacuum and inspect it for any debris or obstructions. If there is a clog, use a long, thin object like a coat hanger to remove it. You can also use attachments like a crevice tool or dusting brush to clean out the hose.
Brush Roll
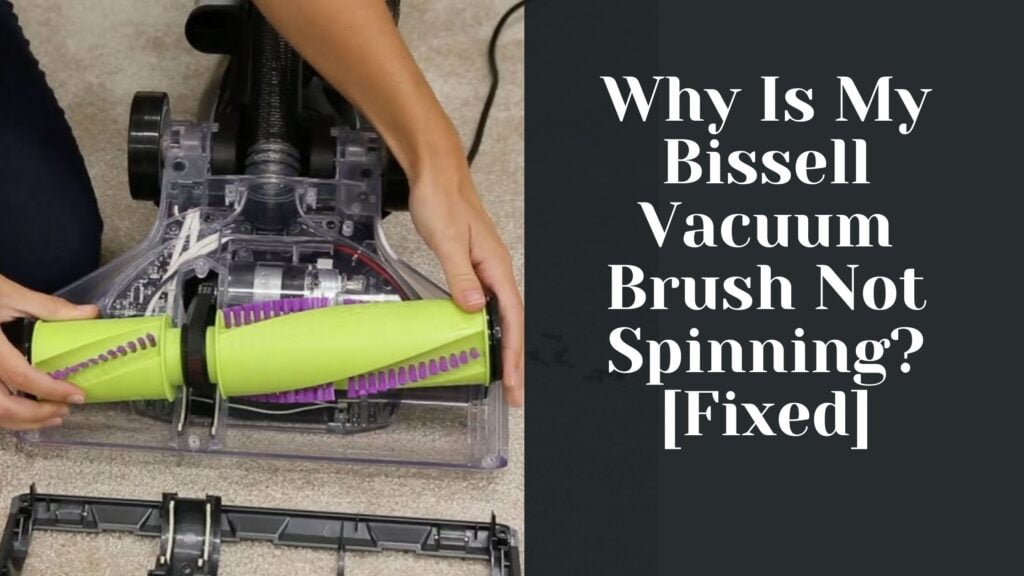
The brush roll can also become clogged with debris. To check for blockages, turn off the vacuum and unplug it. Then, flip the vacuum over and remove the brush roll. Inspect it for any debris or obstructions and remove them if necessary. You can also use a pair of scissors to cut away any hair or string that may be tangled around the brush roll.
Dust Cup
The dust cup or canister can also become clogged with debris. To check for blockages, detach the dust cup from the vacuum and empty it. Inspect it for any debris or obstructions and remove them if necessary. You can also use a soft-bristled brush to clean out the dust cup.
It’s important to check for blockages regularly to ensure that your Shark vacuum is working properly. By following these steps, you can easily identify and remove any obstructions that may be preventing your vacuum from starting.
Inspecting and Cleaning Filters
When your Shark vacuum won’t start, it could be due to dirty filters. Inspecting and cleaning filters is an essential part of vacuum maintenance that can extend the life of your vacuum and ensure optimal performance. Here’s how to inspect and clean the three types of filters found in most Shark vacuums:
Foam Filter
The foam filter is located on top of the motor housing. To inspect and clean the foam filter, follow these steps:
- Turn off and unplug the vacuum.
- Remove the dust cup and pull out the foam filter.
- Rinse the foam filter under running water until the water runs clear.
- Squeeze out excess water and let the filter air dry for at least 24 hours.
- Once the filter is dry, reinsert it into the vacuum.
Felt Filter
The felt filter is located below the foam filter. To inspect and clean the felt filter, follow these steps:
- Turn off and unplug the vacuum.
- Remove the dust cup and pull out the foam filter.
- Remove the felt filter from the motor housing and tap it gently to remove any loose dirt and debris.
- Rinse the felt filter under running water until the water runs clear.
- Squeeze out excess water and let the filter air dry for at least 24 hours.
- Once the filter is dry, reinsert it into the vacuum.
HEPA Filter
The HEPA filter is located at the bottom of the dust cup. To inspect and clean the HEPA filter, follow these steps:
- Turn off and unplug the vacuum.
- Remove the dust cup and remove the HEPA filter from the cup.
- Tap the filter gently to remove any loose dirt and debris.
- Rinse the filter under running water until the water runs clear.
- Squeeze out excess water and let the filter air dry for at least 24 hours.
- Once the filter is dry, reinsert it into the dust cup.
Remember to inspect and clean your filters regularly to ensure that your Shark vacuum continues to perform at its best.
Troubleshooting Motor Issues
If your Shark vacuum lights are on but the vacuum won’t start, it could be due to motor issues. Here are some troubleshooting tips to help you identify and resolve motor-related problems:
Check the power cord: Before checking the motor, make sure that the power cord is securely plugged in and that the outlet is functioning correctly.
Test the motor: If the power cord is not the issue, the next step is to test the motor. To do this, remove the motor from the vacuum and use a multimeter to check its resistance. If the motor has zero or infinite resistance, it is likely damaged and needs to be replaced.
Check the motor thermostat: If the motor is functioning correctly but the vacuum still won’t start, the problem could be due to a faulty motor thermostat. The thermostat is designed to prevent the motor from overheating, so if it is malfunctioning, the motor may not receive the necessary power to start. Check the thermostat using a multimeter and replace it if necessary.
Clean the motor: If the motor is dirty or clogged with debris, it may not function correctly. Clean the motor using a soft brush or compressed air to remove any dirt and debris that may be blocking the airflow.
Replace the damaged motor: If the motor is damaged beyond repair, you will need to replace it. Shark offers replacement motors for their vacuum cleaners, and you can purchase them online or through their customer service department.
By following these troubleshooting tips, you should be able to identify and resolve motor-related issues with your Shark vacuum cleaner. If the problem persists, contact Shark’s customer service department for further assistance.
Battery and Cord Issues
If your Shark vacuum lights are on but won’t start, the problem may be related to the battery or cord. Here are some troubleshooting tips to help you fix the issue.
Cordless Vacuum
If you have a cordless Shark vacuum, the first thing to check is the battery. If the battery is dead, the vacuum will not start. To check the battery, remove it from the vacuum and test it with a multimeter. If the battery is dead, you will need to replace it.
Another common issue with cordless vacuums is that the battery may not be properly inserted. Make sure the battery is securely inserted into the vacuum and that the contacts are clean.
Robot Vacuums
If you have a Shark Ion robot vacuum, you may need to reset the vacuum to fix the issue. To reset the vacuum, locate the factory reset button on the underside of the vacuum and press and hold it for 10 seconds. Then, release the button and wait for the vacuum to reboot.
If your robot vacuum is not starting, it may also be related to the charging dock. Make sure the dock is plugged in and that the vacuum is properly seated on the dock. If the dock is not working, you may need to replace it.
Vacuum Cord
If you have a corded Shark vacuum, the first thing to check is the power cord. Make sure the cord is properly plugged into the wall outlet and the vacuum. If the cord is frayed or damaged, you will need to replace it.
Another issue with corded vacuums is that the circuit breaker or fuse may be tripped. Check the circuit breaker or fuse box and reset it if necessary.
In summary, if your Shark vacuum lights are on but won’t start, it may be related to the battery or cord. Make sure the battery is properly inserted or replace it if necessary. Check the charging dock for robot vacuums and the power cord for corded vacuums. If the issue persists, contact Shark customer service for further assistance.
Advanced Troubleshooting
If you have already checked the power plug and battery and your Shark vacuum still won’t start, it may be time to move on to more advanced troubleshooting techniques. Here are some steps you can take to diagnose and fix the issue:
Check the Indicator Light
The indicator light on your Shark vacuum can provide valuable information about the system’s status. If the light is not turning on at all, it may indicate a problem with the power supply. If the light turns on but the vacuum still won’t start, it may suggest a problem with the motor or another component.
Use a Multimeter
A multimeter is a handy tool that can help you diagnose electrical issues in your Shark vacuum. You can use a multimeter to test the power cord, motor, and other components for continuity and voltage. Be sure to follow the manufacturer’s instructions carefully when using a multimeter.
Consult the Troubleshooting Guide
If you’re still having trouble getting your Shark vacuum to start, consult the troubleshooting guide that came with your unit. The guide may provide specific solutions for common problems, such as clogs or filter issues. You can also find troubleshooting guides online if you no longer have the original manual.
By following these advanced troubleshooting steps, you may be able to diagnose and fix the issue preventing your Shark vacuum from starting. If you’re still having trouble, contact Shark customer service for further assistance.
Maintaining Your Shark Vacuum
Proper maintenance of your Shark vacuum is crucial to ensure its longevity and optimal performance. Here are some tips to help you maintain your Shark vacuum:
Read the Manual
Before using your Shark vacuum, it is essential to read the manual thoroughly. The manual contains valuable information on how to use and maintain your vacuum.
Clean the Filter
The filter is a critical component of your Shark vacuum. Over time, the filter can become clogged with dirt and debris, reducing the vacuum’s airflow and suction power. To prevent this, you should clean the filter regularly. Most Shark vacuums come with washable filters that can be easily removed and cleaned.
Check the Warranty
Shark vacuums come with a warranty that covers defects in materials and workmanship. It is essential to check your warranty and ensure that you are following the manufacturer’s recommended maintenance procedures. Failure to do so may void your warranty.
Handle with Care
The handle of your Shark vacuum is another critical component that requires proper maintenance. The handle can become loose or damaged over time, affecting the vacuum’s performance. To prevent this, you should handle your vacuum with care and avoid dropping it or knocking it against hard surfaces.
Clean the Airflow
The airflow is crucial to the performance of your Shark vacuum. Over time, dirt and debris can accumulate in the airflow path, reducing the vacuum’s suction power. To prevent this, you should clean the airflow path regularly. You can use a brush or a vacuum cleaner to remove any dirt or debris that may have accumulated in the airflow path.
By following these tips, you can ensure that your Shark vacuum remains in optimal condition and performs at its best.
Frequently Asked Questions
Is there a reset button on Shark vacuum?
Yes, some Shark vacuum models have a reset button located on the brush roll motor. This button will reset the motor and allow it to start again if it has shut off due to overheating or a blockage.
How do you reset the Shark vacuum cleaner when it overheats?
To reset a Shark vacuum that has overheated, you should unplug it from the power source and let it cool down for at least 45 minutes. Once it has cooled down, you can plug it back in and turn it on. If the vacuum still does not turn on, you may need to check for blockages or contact Shark customer service for further assistance.
Why are the lights flashing on my Shark vacuum not working?
The flashing lights on a Shark vacuum can indicate a variety of issues, such as a blockage in the brush roll or a problem with the motor. You can troubleshoot the issue by considering other symptoms accompanying those flashing lights.
What does 2 flashing lights on a Shark vacuum mean?
Two flashing lights on a Shark vacuum can indicate a problem with the brush roll motor or a blockage in the brush roll. You should check the brush roll and clean any blockages before attempting to turn the vacuum on again.
Where is the fuse located on a Shark vacuum?
Shark vacuums do not typically have a fuse that can be replaced. If your Shark vacuum is not turning on, you should check the power cord and plug for any damage or loose connections.
Why won’t my Shark cordless vacuum turn on?
If your Shark cordless vacuum is not turning on, you should check to make sure the battery is charged and properly installed. You can also try resetting the vacuum by holding down the power button for 10-15 seconds. If the vacuum still does not turn on, you may need to contact Shark customer service for further assistance.


