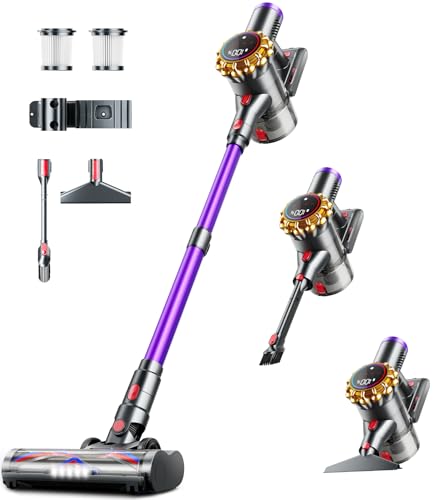
Encountering a blinking blue light issue on your INSE vacuum can be frustrating, especially when you’re unsure of the cause or how to fix it.
The good news is that it is usually nothing to worry about 🙂
This in-depth guide will provide you with a thorough understanding and step-by-step instructions to troubleshoot and resolve the problem in no time.
Let’s explore each troubleshooting step in detail!
Inse Vacuum Blinking Blue Light – Summary
A blinking blue light on an INSE vacuum generally signifies low battery (under 5%) or obstructions within the vacuum. Recharge the battery or resolve blockages in the motorized brush, metal tube, filters, or air inlet to maintain efficient vacuum operation.
How To Get Rid of The Blinking Blue Light
Now that we’ve identified the common reasons behind the blinking blue light on your INSE vacuum, let’s dive into the step-by-step troubleshooting process.
Step 1 – Check the Battery, Charger, and Wall Outlet
Before jumping to conclusions about a low battery, it’s essential to inspect the entire charging system.
To do this, follow these steps:
- Check the wall outlet: Ensure that the wall outlet is functioning correctly by testing it with another electronic device. If the outlet is faulty, try charging the vacuum in a different outlet.
- Inspect the charger: Examine the charger for any signs of damage, such as frayed wires or bent prongs. If you suspect that the charger is damaged, consider replacing it.
- Recharge the battery: If the wall outlet and charger are in good condition, connect the vacuum to the charger. It takes about 4-5 hours for the battery to be fully charged. When the battery is fully charged, the indicator light will turn solid and stop flashing.
- Replace the battery: If the battery doesn’t hold a charge, consider replacing it or contacting INSE support for assistance.
Step 2 – Detach Attachments and Test the Vacuum Motor
Once you’ve ruled out battery issues, the next step is to detach all the attachments and test the vacuum motor.
Turn on the vacuum motor without any attachments and observe if it works correctly.
If the vacuum motor works, this indicates that the problem may lie in the attachments or other parts of the vacuum.
Proceed to the next steps to check for blockages, dustbin, and filter issues.
Step 3 – Inspect for Blockages in the Motorized Cleaner Head and Tube
A blockage in the motorized cleaner head or the tube can cause the vacuum to underperform and trigger the blinking blue light.
To inspect for blockages, follow these steps:
- Detach the motorized cleaner head from your INSE vacuum.
- Inspect the cleaner head and tube for any debris, hair, or objects causing blockages.
- Use a long, flexible brush or a straightened coat hanger to remove any blockages you find.
- Reattach the motorized cleaner head to the vacuum and test its performance.
Step 4 – Check the Dustbin and Clean if Necessary
A full or dirty dustbin can also contribute to clogging your INSE vacuum and trigger the blue light.
To check and clean the dustbin, follow these steps:
- Detach the dustbin from the vacuum.
- Empty the dustbin into a garbage bag.
- If the dustbin appears dirty or clogged, wash it with warm soapy water and let it air dry before reassembling the vacuum.
- Once the dustbin is clean and dry, reattach it to the vacuum.
Regularly emptying and cleaning the dust bin will help maintain your vacuum’s performance and reduce the likelihood of encountering the blinking blue light issue.
Step 5 – Examine and Clean Filters
Dirty or clogged filters can also cause the blinking blue light. To examine and clean the filters, follow these steps:
- Identify the filters on your specific INSE vacuum model. The cotton filters are for the S6/S6P, and the HEPA filters are for the S6T/S6P Pro.
- Carefully remove the filters from the vacuum.
- Check the filters for dirt or debris buildup. If they appear dirty or clogged, proceed to clean or replace them.
- Reinstall the filters: Once the filters are clean and dry, reinstall them in the vacuum.
The metal filter can be washed, and the original cotton filters are also washable.
To clean the filters, use warm water and mild soap, then let them air dry.
If the filters are damaged or heavily soiled, replace them with new filters according to the manufacturer’s guidelines.
Cleaning or replacing the filters regularly will help maintain your vacuum’s performance and minimize issues like the blinking blue light.
Step 6 – Ensure Proper Installation of the Rubber Seal
An improperly installed rubber seal on the vacuum hose can cause air leakage, resulting in weak suction power.
To check and correct the rubber seal installation, follow these steps:
- Locate the rubber seal on your INSE vacuum hose.
- Ensure that the rubber seal is correctly installed and seated in place.
- If the seal is not installed correctly, reposition it to ensure a proper fit and prevent air leakage.
Proper installation of the rubber seal will help maintain your vacuum’s suction power and reduce the likelihood of the blinking blue light issue.
Step 7 – Inspect and Clean the Air Inlet
The air inlet of the main motor is another area where blockages can occur.
Inspect the black rubber piece of the air inlet for any debris or dirt, and clean it if necessary.
Ensuring that the air inlet remains clean will help your INSE vacuum function at its best.
What If The Inse Blinking Blue Light Persists?
If the issue remains unresolved after troubleshooting, remember that INSE vacuum products come with a warranty that covers the original unit and non-wearable parts deemed defective for up to 12 months from the original purchase date.
The warranty covers repair or replacement of the defective parts at INSE’s sole discretion.
For troubleshooting and warranty claims, contact INSE support team.
They will assist you with further guidance and help you determine if a repair or replacement is necessary.
Conclusion
The blinking blue light on your INSE vacuum can be a nuisance, but with this comprehensive troubleshooting guide, you’ll be well-equipped to identify and resolve the issue.
Regular maintenance and cleaning of your vacuum will help ensure optimal performance and reduce the likelihood of encountering this issue in the future.
If all else fails, remember to take advantage of the warranty provided by INSE and contact their support team for assistance.


