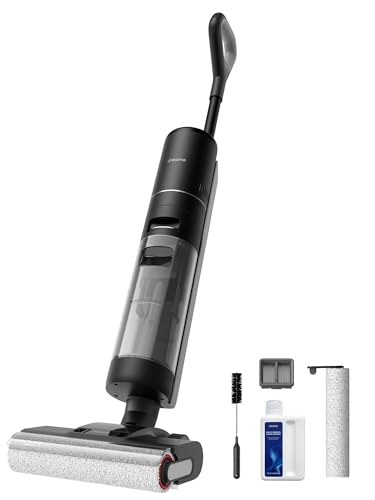
If you own a Dreame H11 wet and dry vacuum cleaner, you may have encountered the error code E4 on the screen display.
This error indicates that there is a problem with the battery or the charging system of the vacuum.
In this blog post, we will explain all the possible reasons why this error occurs and how to solve each issue step by step 🙂
Dreame H11 Error E4 – In a Nutshell
The error code E4 on your Dreame H11 vacuum cleaner means that there is a problem with the battery or the charging system. This could be caused by several factors, such as a faulty battery, a damaged charger, a loose connection, a dirty contact, or a low ambient temperature.
To fix this error, you need to check each component and make sure they are working properly.
You will have to:
- Replace the battery or the charger if they are defective
- Clean the battery contacts
- Adjust the room temperature if it is affecting the charging process.
How to fix Dreame H11 Error E4
Let’s take a closer look at each troubleshooting step.
Step 1: Check the battery
The first thing you need to do is to check the battery of your Dreame H11 vacuum cleaner.
The battery is located at the bottom of the handle assembly and can be removed by pressing the release button:
- Inspect the battery for any signs of damage, such as cracks, leaks, swelling, or corrosion.
- Check the voltage of the battery using a multimeter. The normal voltage range for the Dreame H11 battery is between 21V and 25V. If the voltage is lower than 21V, it means that the battery is discharged and needs to be charged. If the voltage is higher than 25V, it means that the battery is overcharged and may be damaged.
If you find any damage or abnormal voltage on your battery, you should replace it with a new one.
You can buy a replacement battery from Dreametech’s official website or authorized dealers.
Do not use a battery from other brands or models as it may not be compatible with your Dreame H11 vacuum cleaner.
Step 2: Check the charger
The next thing you need to do is to check the charger of your Dreame H11 vacuum cleaner.
Inspect the charger for any signs of damage, such as cracks, burns, or fraying.
Just like you did in step 1, you can also check the output voltage of the charger using a multimeter.
The normal output voltage range for the Dreame H11 charger is between 26V and 28V. If the output voltage is lower than 26V or higher than 28V, it means that the charger is defective and needs to be replaced.
You can buy a replacement charger from Dreametech’s official website or authorized dealers.
Do not use a charger from other brands or models as it may not be compatible with your Dreame H11 vacuum cleaner.
Step 3: Check the connection
Check the connection between the battery and the charger of your Dreame H11 vacuum cleaner.
The connection is made by inserting the charging port on the handle assembly into the charging slot on the charger.
You should make sure that the connection is secure and not loose or wobbly and that there are no obstacles or foreign objects blocking or interfering with the connection.
If you find any loose or blocked connection between your battery and your charger, you should fix it by tightening or clearing it. You may need to use a small tool such as a screwdriver or a toothpick to do so.
Step 4: Check the contact
The fourth thing you need to do is to check the contact between the battery and the handle assembly of your Dreame H11 vacuum cleaner.
The contact is made by two metal pins on the bottom of the handle assembly that touch two metal plates on the top of the battery.
Make sure that the contact is clean and not dirty or corroded.
If you find any dirty or blocked contact between your battery and your handle assembly,
you should clean it by wiping it with a soft cloth or a cotton swab dipped in alcohol.
Step 5: Check the temperature
The temperature of the environment where you are charging your Dreame H11 vacuum cleaner can have a huge impact on the charging process.
The optimal temperature range for charging your Dreame H11 vacuum cleaner is between 5°C and 40°C.
If the temperature is lower than 5°C, it may cause the battery to discharge faster and reduce its lifespan. If the temperature is higher than 40°C, it may cause the battery to overheat and damage its components.
If you find that the temperature of your environment is too low or too high for charging your Dreame H11 vacuum cleaner, you should adjust it by moving to a warmer or cooler place.
Avoid exposing your Dreame H11 vacuum cleaner to direct sunlight or extreme heat sources.
What To Do If None of The Steps Help
If you have followed all the steps above and still get the error code E4 on your Dreame H11 vacuum cleaner, it means that there is a more serious problem with your device that requires professional assistance.
In this case, you should contact Dreametech via phone, email, or online chat.
Before you contact Dreametech, you should check if your Dreame H11 vacuum cleaner is still under warranty.
The warranty period for the Dreame H11 vacuum cleaner is 12 months from the date of purchase.
If your device is still under warranty, you may be eligible for a free repair or replacement service.
You will need to provide proof of purchase and the serial number of your device to claim the warranty service.
If your device is not under warranty, you may still be able to get a repair or replacement service from Dreametech, but you may have to pay for it.
Conclusion
I hope this blog post has helped you understand and fix the error code E4 on your Dreame H11 vacuum cleaner 🙂
If you have any questions or feedback, please feel free to contact us.
Thank you for reading!


