Shark robot vacuums are a popular choice for homeowners who want to keep their floors clean without the hassle of manual cleaning. However, like any machine, these robots can experience errors that prevent them from functioning properly. One such error is Error 9, which can be frustrating for users who are not sure how to fix it.
Error 9 on Shark robot vacuums is typically caused by a hardware fault with the vacuum’s bumper. This fault can prevent the vacuum from moving freely, which can be frustrating for users who are trying to clean their floors. Fortunately, there are several ways to fix Error 9 and get your Shark robot vacuum back up and running.


Understanding Shark Robot Error 9
Shark Robot Error 9 is one of the most common errors that Shark robot vacuum owners encounter. It is usually caused by a hardware fault with the vacuum’s bumper. In other words, there is a problem that prohibits the vacuum from moving freely due to a fault with the bumper.
When the Shark robot cleaner detects an error 9, it notifies you through her voice. She would say, “Please check my dust bin error 9,” after you hit the clean button. And she wouldn’t start cleaning until you fix this dust bin not installed error.
Here are some possible causes of Shark Robot Error 9:
- Obstruction in the robot’s path
- Faulty bumper sensor
- Malfunction in the robot’s motor
- Dirty or clogged dustbin or filter
To fix Shark Robot Error 9, you can try the following steps:
- Check the dustbin: The first thing you need to do is to fix it by removing the dustbin. Make sure it is clean and free from any debris.
- Remove obstruction: If you notice any obstruction in the robot’s path, remove it and try running the robot again.
- Check the bumper: If the bumper is faulty, you may need to replace it. Check for any damage or wear and tear on the bumper.
- Clean the filters: If the filters are dirty or clogged, this can cause Shark Robot Error 9. Remove and clean the filters, empty the dustbin, and eliminate any dirt clogging the robot.
- Restart the robot: After you have tried all the above steps, restart the robot and check if the error has been resolved.
In conclusion, Shark Robot Error 9 can be frustrating, but it is usually easy to fix. By following the steps outlined above, you can get your Shark robot vacuum back to cleaning your home in no time.
Common Causes of Error 9
Error 9 is a common issue that occurs in Shark Robot Vacuums. This error is usually caused by hardware faults or issues that prohibit the vacuum from moving freely. In this section, we will discuss the common causes of Error 9 in Shark Robot Vacuums.
Obstacle Related Issues
One of the most common causes of Error 9 is obstruction or blockages. When the Shark Robot Vacuum detects an obstacle in its path, it may stop and display the error message. The front bumper may also get stuck, causing the vacuum to stop moving. If you encounter this issue, try moving the vacuum to a new location on a level surface and make sure the front bumper is not stuck.
Sensor Related Issues
Another common cause of Error 9 is sensor-related issues. The front wheel sensor, drop sensor, or bumper may report an error, causing the vacuum to stop working. If the CLEAN light continues to flash blue, you may need to remove the front wheel and clean the wheel cavity.
Charging and Power Issues
Charging and power-related issues can also cause Error 9 in Shark Robot Vacuums. If the battery is low or the charging dock is not working correctly, the Shark Robot Vacuum may stop and display the error message. Try charging the vacuum for a few hours and ensure that the charging dock is correctly connected. If the issue persists, you may need to power cycle the vacuum or replace the battery or charger.
In summary, Error 9 in Shark Robot Vacuums can be caused by various issues such as obstruction, sensor-related problems, and charging and power-related issues. If you encounter this error, try troubleshooting the issue by following the steps mentioned above. If the issue persists, contact the manufacturer for further assistance.
Troubleshooting Error 9
If you encounter Error 9 with your Shark Robot Vacuum, there are a few things you can try to fix the issue. This section will cover the steps you can take to troubleshoot Error 9.
Resetting the Robot
Sometimes, resetting the robot can help resolve Error 9. To reset the robot, follow these steps:


- Turn off the robot by pressing and holding the power button until it turns off.
- Turn the robot over and remove the battery.
- Wait for 30 seconds and then reinsert the battery.
- Turn the robot back on by pressing the power button.
Cleaning the Robot
Error 9 can also be caused by dirt or debris in the robot’s sensors or brushes. To clean the robot, follow these steps:
- Turn off the robot by pressing and holding the power button until it turns off.
- Remove the side brush and clean it.
- Clean the front wheel sensor, drop sensor, and bumper.
- Remove the dustbin and empty it.
- Clean the drive wheel and front bumper.
- Reassemble the robot and turn it back on.
Fixing Charging Issues
If the robot is not charging properly, it can also cause Error 9. To troubleshoot charging issues, follow these steps:
- Make sure the robot is properly connected to the charging dock.
- Check the charging contacts on the robot and dock for dirt or debris and clean if necessary.
- Make sure the robot is in sleep mode when charging.
- If the Wi-Fi signal is weak, move the charging dock closer to the router.
By following these steps, you can troubleshoot Error 9 with your Shark Robot Vacuum. If the issue persists, refer to the Shark Robot Error Codes Troubleshooting guide for additional help.
Maintenance to Prevent Error 9
Prevention is always better than cure. It is essential to maintain your Shark Robot Vacuum regularly to avoid any errors, especially Error 9. Here are some maintenance tips that you can follow to prevent Error 9 from occurring.
Regular Cleaning
Regular cleaning of the Shark Robot Vacuum is essential to maintain its efficiency and prevent any errors. You should clean the brushes, filters, and dustbin after every use. The dustbin should be emptied and cleaned thoroughly to prevent any debris or dirt from clogging the suction. The side brushes and brush roll should also be checked for any hair or debris that may get tangled, affecting the suction.
Proper Placement of the Robot
The Shark Robot Vacuum should be placed correctly on the floor to prevent any errors. It is essential to ensure that the bumper and wheels are clean and free of any obstructions. The cliff sensors should also be checked to ensure that they are not blocked or dirty.


Regular Check on Sensors
The Shark Robot Vacuum has sensors that help it navigate around your home. These sensors can get dirty or blocked, leading to errors such as Error 2 or Error 9. It is essential to check the sensors regularly and clean them if necessary. The wheel motor encoder should also be checked to ensure that it is not dirty or blocked.
By following these maintenance tips, you can prevent Error 9 from occurring and keep your Shark Robot Vacuum running smoothly. Remember to always turn off the power before performing any maintenance and consult the user manual for any specific instructions.
When to Contact Shark Customer Service
While most errors with the Shark robot vacuum can be resolved with some troubleshooting and basic maintenance, there may be instances where you need to contact Shark customer service for assistance. Here are some scenarios where it may be necessary to reach out to customer support:
- Persistent Error 9: If you have tried all the recommended fixes for Error 9 and the problem persists, it may be time to contact Shark customer service. They can help you troubleshoot the issue and determine if a replacement or repair is necessary.
- Product Defects: If you suspect that your Shark robot vacuum has a defect or malfunction that cannot be resolved through troubleshooting, contact customer service for assistance. They can help you determine if your product is covered under warranty and provide guidance on how to proceed.
- Order Issues: If you have questions or concerns about your order, such as shipping delays or incorrect items received, Shark customer service can help you resolve the issue quickly and efficiently.
- Product Registration: If you have not yet registered your Shark robot vacuum, customer service can assist you with the process. Registering your product can help facilitate future repairs or replacements and ensure that you receive important product updates and information.
When contacting Shark customer service, be sure to have your product information and order details on hand. This will help expedite the process and ensure that your issue is resolved as quickly as possible. Customer support is available during weekdays and weekends, so don’t hesitate to reach out if you need assistance.
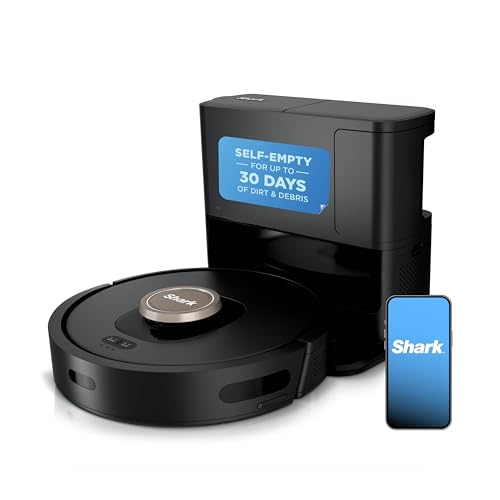
Using the SharkClean App for Troubleshooting
The SharkClean app is a powerful tool that can help you troubleshoot issues with your Shark robot vacuum. The app is available for both Android and Apple iOS devices and can be downloaded from the respective app stores. Once installed, the app allows you to control and monitor your Shark robot vacuum from your smartphone or tablet.
To use the SharkClean app for troubleshooting, follow these steps:
- Open the SharkClean app on your smartphone or tablet.
- Make sure that your Shark robot vacuum is connected to your Wi-Fi network and is turned on.
- Tap on the “Support” tab in the bottom menu of the app.
- Select “Troubleshooting” from the list of options.
- Follow the on-screen prompts to diagnose and resolve any issues with your Shark robot vacuum.
The SharkClean app provides detailed instructions and troubleshooting tips for a range of issues, including error code 9. If you encounter this error code, the app will guide you through the steps to resolve the issue.


In addition to troubleshooting, the SharkClean app also allows you to schedule cleanings, monitor your robot vacuum’s cleaning progress, and receive notifications when the vacuum needs maintenance or encounters an issue.
Overall, the SharkClean app is an essential tool for anyone who owns a Shark robot vacuum. It provides a convenient way to control and monitor your vacuum, and can help you quickly resolve any issues that arise.
Purchasing a New Shark Robot Vacuum
If you’re looking to purchase a new Shark Robot Vacuum, you’re in luck! Shark offers a variety of models to fit your cleaning needs and budget. Here are a few things to keep in mind when shopping for a new Shark Robot Vacuum:
- Consider your cleaning needs: Do you have pets? Are you dealing with a lot of debris or dust? Shark offers robot vacuums with different features to fit your specific cleaning needs.
- Look for promotions: Shark often runs promotions on their website, so be sure to check for any current deals before making your purchase. You can also sign up for their email list to receive exclusive offers and updates.
- Shop now: You can purchase Shark Robot Vacuums directly from their website or through authorized retailers. Be sure to shop around to find the best price and availability.
- Check order status: Once you’ve made your purchase, you can check your order status on the Shark website. You’ll receive a confirmation email with tracking information once your order has shipped.
Overall, purchasing a new Shark Robot Vacuum is a great investment in your home cleaning routine. With a variety of models and features to choose from, you’re sure to find the perfect fit for your needs.
Frequently Asked Questions
What does error 9 mean on a Shark robot?
Error 9 on a Shark robot indicates that the robot has encountered an issue with its bumper sensor. This can happen when the bumper sensor is dirty, damaged, or obstructed.
How do I fix error 9 on my Shark robot?
To fix error 9 on your Shark robot, you can try tapping on the bumper to dislodge any dirt or debris. You can also power cycle the robot, restore the cliff sensors’ functionality, choose a safer path in your cleaning schedule, empty the dustbin, and reset the robot.
Are there any common causes of error 9 on Shark robots?
The most common causes of error 9 on Shark robots are dirty or obstructed bumper sensors, damaged bumper sensors, or issues with the robot’s software or firmware.
What is the difference between error 9 and error 26 on a Shark robot?
Error 9 on a Shark robot indicates an issue with the bumper sensor, while error 26 indicates a problem with the robot’s side brush.
Can error 9 be prevented on Shark robots?
You can prevent error 9 on Shark robots by keeping the bumper sensor clean and free of debris, avoiding collisions with walls and furniture, and resetting the robot periodically.
Is there a way to clear error 9 on my Shark robot?
Yes, you can clear error 9 on your Shark robot by tapping on the bumper, power cycling the robot, restoring the cliff sensors’ functionality, choosing a safer path in your cleaning schedule, emptying the dustbin, and resetting the robot.